

I originally wrote this tutorial for The Vintage Post. That site isn't around anymore but I was able to locate the instructions for this 1950s pin to share with you here! Make this adorable tambourine pin from 1957 with scraps from around the house!
Also check out my e-book, Pins for Pin-Ups: DIY Brooches for Retro Girls for 12 more vintage novelty brooches that you can make using supplies from the recycling bin!

Hi, I’m Brittany from Vavoom Vintage, and here’s a whimsical novelty brooch that you can make with scraps from the craft room and kitchen!
Today, I’ll show you how to make a tambourine brooch from a 1957 craft book.

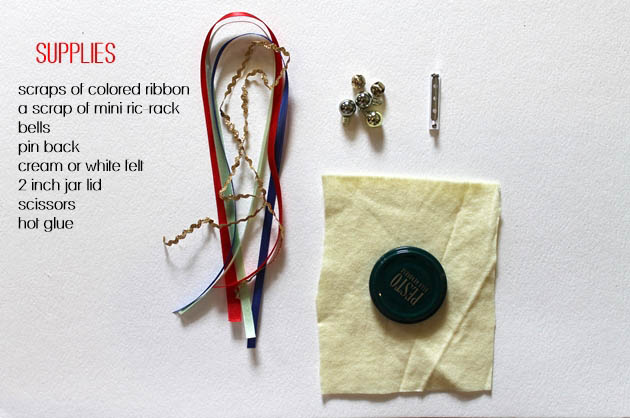
You will need:
a 2 inch jar lid
a scrap of white or cream felt, a little larger than the lid
lengths of colorful, thin ribbon
a few jingle bells
hot glue and glue gun
scissors
a scrap of chipboard from a cereal box
Begin by cutting the felt into a circle, about an inch and a half larger than the jar lid. Hot glue the felt to the front of the lid.
Flip the lid over and glue the felt to the inner rim of the lid, pulling it snug to create a smooth front.

String each bell onto a 6 inch length of ribbon

Cut a length of rick rack to match the outer rim of the lid. Tie the bells with even spacing to the rick rack

Hot glue the rick rack to the outer edge of the lid and trim the ribbon to your desired length. Next, cut a circle of the cereal box to fit the inside of the lid. Glue into place and attach your pin back either with adhesive strip or glue

Then enjoy the results!

This is so terrifically charming! You come up with the coolest vintage crafts for us, sweet gal. Thank you for another splendid wearable project.
ReplyDelete♥ Jessica
Thank you.
ReplyDeleteThank you.
THANK YOU!
This will surely head stragiht up my "to do" list.
Marija